Introduction
- Theme Version: 1.6.2
- Created: 05/07/2018
- Latest update: 27/11/2019
Thank you for purchasing our theme. In this document, we provide all kinds of good information with all the details you need to use our theme. We hope you have fun and enjoy working with our theme. If you need more help, please send to [email protected].
Before Getting Started
If you are not familiar with WordPress, please get accustomed with it before proceeding to using our theme. Here are some links that will help you to become more confident with WordPress:
- First Steps with WordPress: http://codex.wordpress.org/First_Steps_With_WordPress
- Explanations on most common WordPress terms: http://en.support.wordpress.com/lexicon/
- Best WordPress-related articles for Web Developers: http://net.tutsplus.com/articles/web-roundups/top-50-wordpress-tutorials/
- WordPress Optimization: https://codex.wordpress.org/WordPress_Optimization
Requirements & Compatibility
Requirements
To run WordPress your host just needs a couple of things:
- PHP version 5.6 or greater
- MySQL version 5.5 or greater
- Post max size > 20MB. If you upload error, please upload via Cpanel or FPT.
Compatibility
Our theme is compatible with these browsers:
- Chrome
- Firefox
- Safari
- Microsoft Edge
- Internet Explorer 11 or later
Installation
Wordpress Core
You download and install WordPress version 4.6 or later
Theme Package
To download, you need to log into your ThemeForest account and go to your http://themeforest.net/downloads page. Locate the theme that you purchased in your Downloads list and click on the Download button

If you download All files & documentation, you will unzip it. Then, you find the installable file inside.
You can also download only the Installable Wordpress file.
WordPress Installation
Follow the steps below to install via WordPress:
- Step 1: Login to your WordPress Dasrdoard.
- Step 2: Navigate to Appearance ► Themes
- Step 3:Click Add New button on top of the page.
- Step 4: Then click Upload Theme.
- Step 5: Next, Browse to the zip file and click install now for the theme to be uploaded and installed
- Step 6: After done installing, click Active the theme.
- Then you will get a notification about installing the required plugins. Follow the steps to install and activate the plugins


FTP Installation
Follow the steps below to install via FTP:
- Step 1: Log into your hosting space via an FTP software
- Step 2: Unzip the Umbala.zip file and ONLY use the extracted Umbala folder
- Step 3: Upload the extracted Umbala folder into wp-content > themes folder
- Step 4: Go to Appearance > Themes and activate Umbala theme
- Then you will get a notification about installing the required plugins. Follow the steps to install and activate the plugins

Required Plugins
Step 1: After activating the theme, you will get a notification about installing the required plugins. You go to Appearance > Install Plugins to install them.

Step 2: Check all the plugins that you want to activate then on the drop down Bulk Actions, choose Activate and click Apply, the plugin installation process will start. Wait for all the plugin activated then you can start customizing your website as you wish

We also notice that you should not update other plugins without updating the theme. Please see our changelog to make sure the current theme's version is compatible with the new plugin's version.
Import Sample Data
Step 1: After activating the plugin, you will Import data(Demo content,Theme Options,Widgets,Revolution). You go to Dashboard > Dummy Content

Step 2:Final, go to your site is check

Note If Import data not success. You can import
Step 1: Go to folder Umbala ► inc ► plugins ► umbala_importer ► data contains data.(all folder is extract)
Step 2:Import Demo Content: Go to Dashboard ► Tools ► Import choose file demo_content.xml


Step 3:Import Widget: Go to Dashboard -> Plugins->Add new install and active

Step 4:Import Widget: Go toDashboard -> Tools->Widget Settings Import select a file "widget_data.json" and click Show Widget Settings

Step 5:Theme Options: Go toDashboard -> Theme Options->Import/Export. Open file theme_options.txt copy all data on field input

Step 6:Revolution: Go toDashboard -> Slider Revolution->Import Slider

Step 7:Revolution: Browse file Go to folder Umbala ► inc ► plugins ► umbala_importer ► revslider choose file is install

Updating The Theme
Manual Update
Follow the steps below to manually update the theme:
- First, you download the new theme package from themeforest. You have to log into your themeforest account and navigate to Downloads tab. You find the Umbala theme in your purchased themes list.
- You can delete the current theme. Don't worry about this. Your data won't be lost.
- You upload the new theme package via Wordpress or FTP software.
Automatic Update
You update the theme through the Envato Market plugin. Follow the steps below to set up this plugin:
- Download and install the Envato Market plugin
- You log into your Themeforest account. Under Settings > API Keys, you generate an API key. Get it.
- In WordPress admin panel, you find the section called Envato Market. You input your envato username and API key.
Please read this tutorial https://envato.com/market-plugin/ to get more information.
- If you translated the theme to another language, you should backup your translation files in the themes > Umbala > languages folder before updating. You should also backup the translation files in the plugin folder.
- After updating the theme, you should update the recommended plugins if there is a notification message about updating plugins. You go to Appearance > Install Plugins to update plugins. If you can not update the recommended plugins in wp admin, you should manually update them. You can find the plugin packages in the theme folder > framework > plugins folder.
- You can not update the Visual Composer and Revolution Slider plugins in Appearance > Install Plugins. To update 2 these plugins, you need to delete them first. Then, you go to Appearance > Install Plugins and install them again.
Updating The Theme
A WordPress child theme is a theme that inherits the functionality of the parent theme. With a child theme, you can make modifications or add additional functionality to the parent theme. The child theme offers the safest and easiest way to modify an existing theme, whether you want to make a few small changes, or extensive ones.
The child theme is included in the theme package. Find the alura-child and upload it to the /wp-content/themes/ folder.
Theme Options
After activating our theme, you can go to Appearance > Theme Options to configure the theme. Below will explain what you can do with Theme Options.
- General: Add your logo and some global options
- Header: Set up header, set up the Header Layout, breadcrumb and other options for header
- Styleing: you can change font and font size in there
- WooCommerce: some global WooCommerce options, such as Product label, Quickshop, Ajax search
- Product Category: you configure your Shop page in there
- Product Detail: Some options for menu
- Blog: configure the Blog Layout and some options to Show/Hide some things on the blog page
- Import/Export: Import/Export your theme options
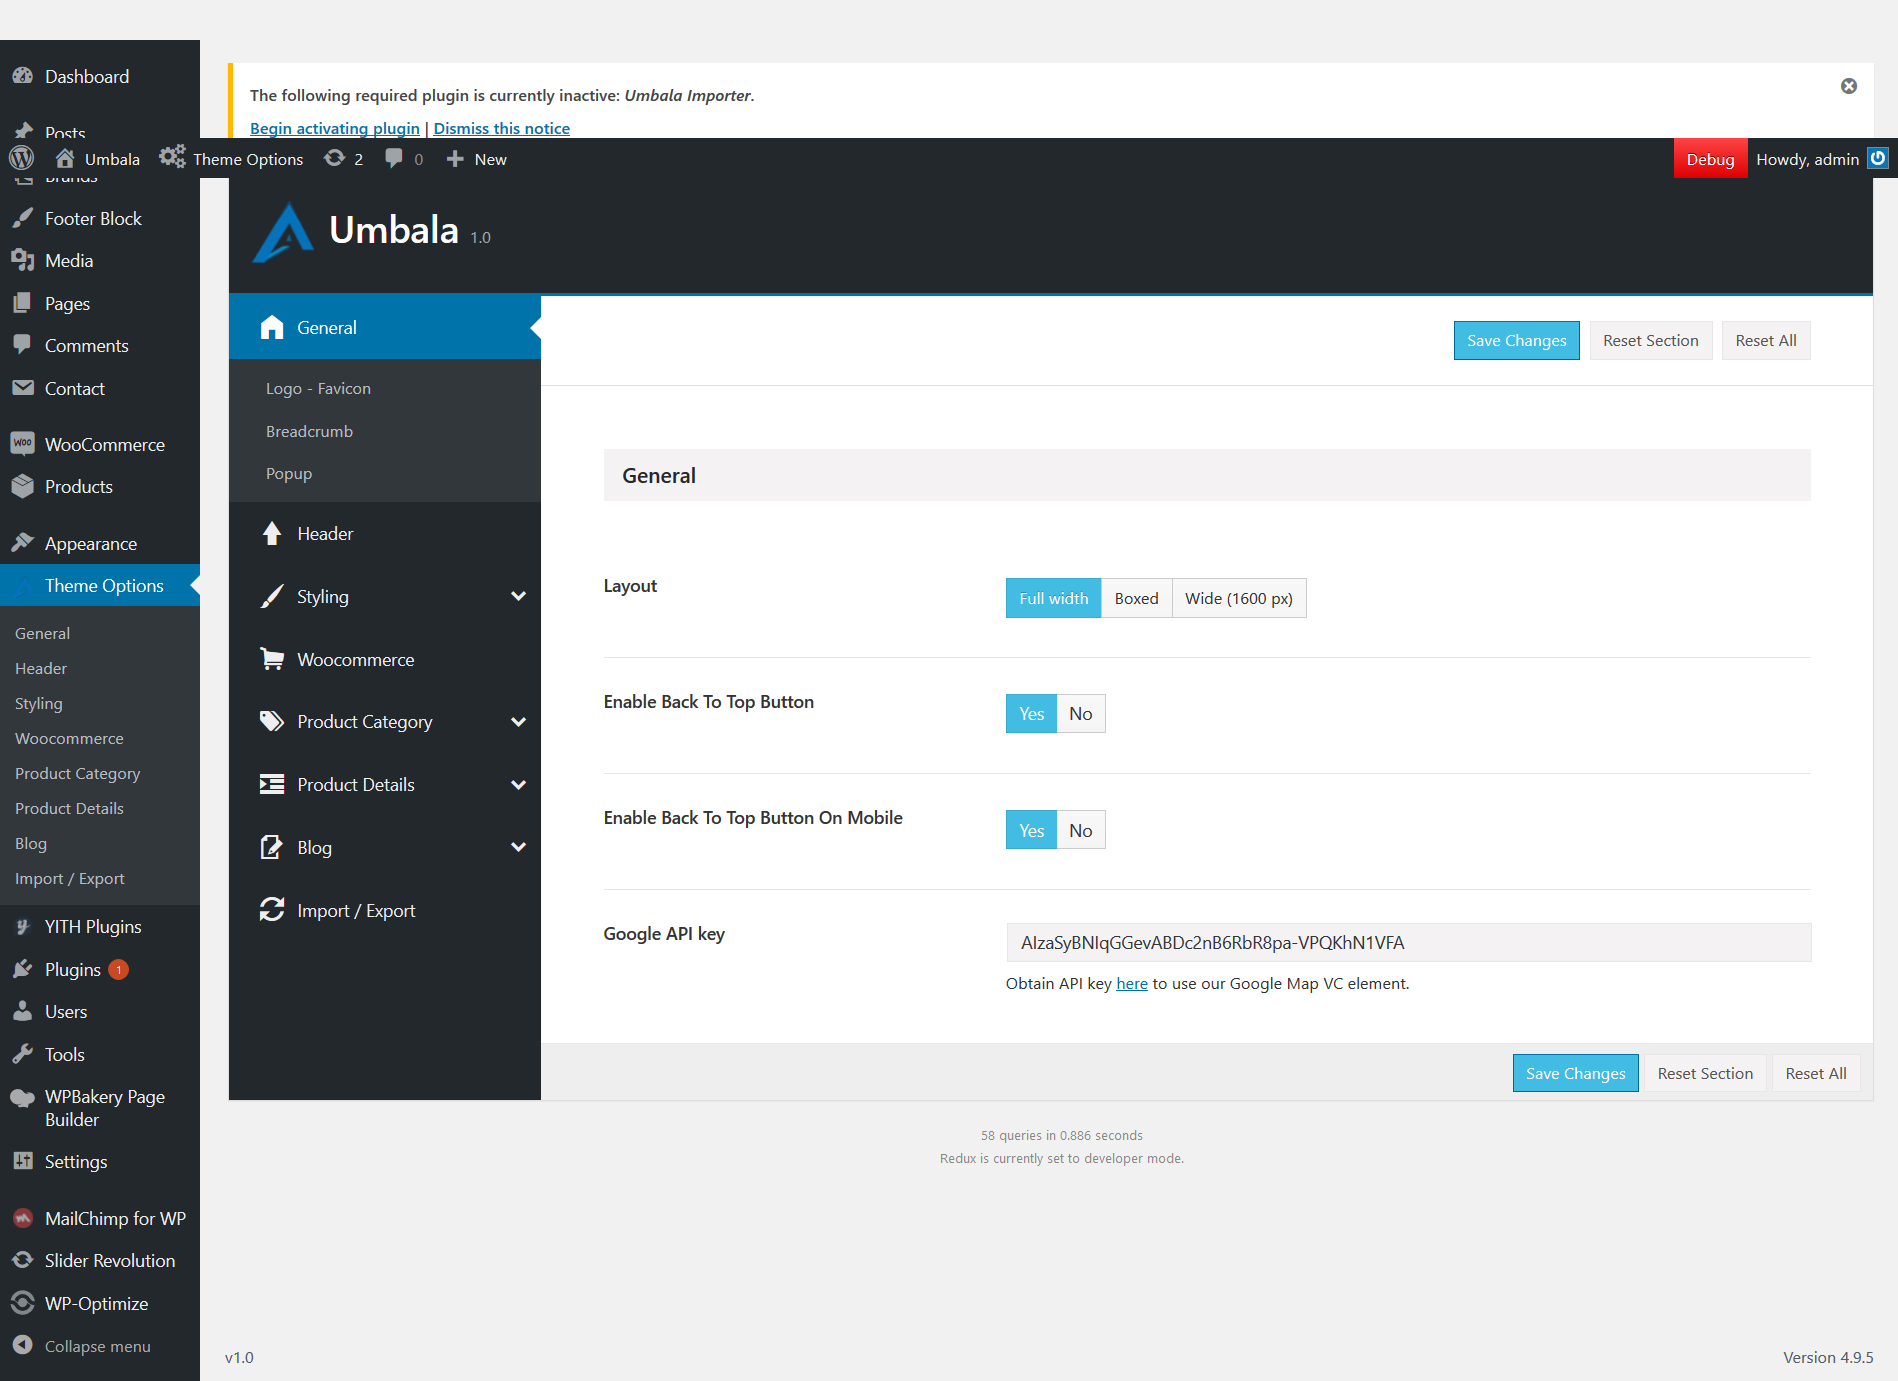
Gerenal
Gerenal

- Layout: Choose Layout Page
- Enable Back To Top Button: Enable/Disable button Back To Top is desktop
- Enable Back To Top Button Mobile: Enable/Disable button Back To Top is mobile
- Google API key: API map for shortcode AluraMap(ex:Page Contact Us..)
Logo - Favicon
- Logo Image: Choose upload logo for site
- Logo Image for sticky header: Choose upload image sticky header when you enable stiky for site
Breadcrumb

- Show page title: Enable or Disable in Breadcrumb
- Breadcrumb Layout: Has many layout Breadcrumb for you choose.
- Breadcrumb Background Image: If you choose image for breadcrumb. We have many background setting for you choose.
Popup

- Enable Popup: Enable or Disable Popup
Header
The header is probably one of the first things you will want to setup. It includes the logo, favicon, menu and other things. The following sections will explain how to set up and customize header.

- Header Layout: Each skin provides different types of headers
- Header on Mobile Devices: Set your header design for mobile devices
Styling
The Styling: Help you can install color,font... for site
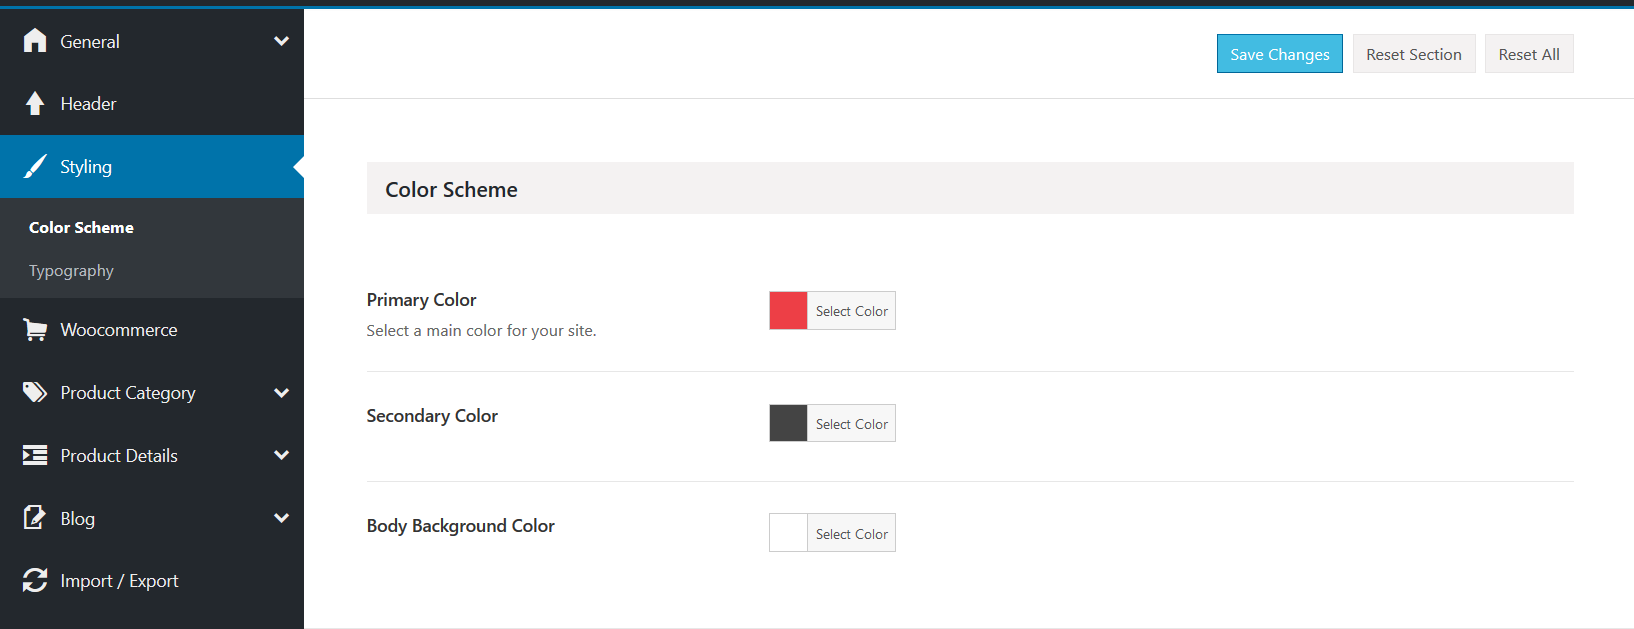
- Color Schema: Set Color for site
Typography

Product Category
Layout
Setting Product Category

- Product Category Layout: We provide a lot of different types of blogs
Grid,List View

Product Detail
Layout
Setting Detail Product

- Product Detail Layout: We provide a lot of different types of blogs
Data Setting

- Product Variation Color Swatches: Enable is show swatches Variation, Disable is show Dropdown variation
Product Image

- Product Zoom:
- Product PhotoSwipe Lightbox:
- Product Thumbnails Style: Choose style thumbnails(Note:option Product Thumbnail must to show)
Blog
Blog
Setting Blog Pages

Blog Details
Setting Blog Detail

Pages
Umbala comes with Visual Composer plugin and powerful Page Options which help you build any kinds of pages. The following sections will explain how to create a new page and make it look like our demo. If you use our One Click Import Demo functionality, you can ignore this.

Shop Page
Umbala supports all the default WooCommerce features for the Shop page, and features additional options as well. You can find the available settings for the Shop page in the Theme Options > Ecommerce > Product Category section and Product Details section.
Also, we have created these special widget areas (Appearance > Widgets) for the Shop page
Shop sidebar


Shop Detail Siderbar


Create A New Page
Follow the steps below to create a new page:
- In admin panel, go to Pages and click on the Add New button
- Input the page title and page content
- On the Page Attributes section, choose the page template from dropdown list
- Scroll down and find the Page Options section, make some configurations for your page

Page Options
In the page editor, you will see the Page Options section at the bottom of editor. It will help you create many kinds of pages.

Some options will override the options in Theme Options. Select Default if you want to use your global settings.
- Layout: select Boxed or Wide layout
- Page Layout: select Fullwidth, Left Sidebar, Right Sidebar or Left & Right Sidebar
- Left Sidebar: select the sidebar to display on the left sidebar
- Right Sidebar: select the sidebar to display on the right sidebar
- Hide Top Bar: choose to hide top bar
- Header Layout: select one of Header Layouts
- Logo allow you to display a different logo on this page
- Header Text Color: allow you to change the color of text on the header
- Primary Menu: select a different menu for this page
- Hide Page Title: show or hide the page title. The page title is hidden on the home page
- Hide Breadcrumb: show or hide the breadcrumb. It is also hidden on the home page
- Breadcrumb Layout: set the layout for your breadcrumb
- Breadcrumb Background Image: change the breadcrumb background image for this page
- Page Slider: allow you to add a slider on your page
- Page Slider Position: set Position for your slider (Before Header or Before Main Content)
- Select Revolution Slider: if you set Page Slider to Revolution Slider, you will select a slider to display
- Footer Top: allow you to display a different Footer Top on this page
- Footer Middle: allow you to display a different Footer Middle on this page
- Footer Bottom: allow you to display a different Footer Bottom on this page
Home Pages
Setting up a home page
- In admin panel, you go to Settings > Reading.
- You choose the A static page(select below) option.
- Select a page from dropdown list of the Front page option.

Header
The header is probably one of the first things you will want to setup. It includes the logo, favicon, menu and other things. The following sections will explain how to set up and customize header.
View :Setting Header
Top bar
Top bar settings: Theme Options

Header Layout
Adding The Logo & Favicon
Follow the steps below to set up the logo & favicon:
- Navigate to Appearance > Theme Options. You select General tab
- Click on the Upload button and choose a file from your library
- You can also add the image link into the input field
Setting Up Header
To set up your header, you go to Appearance > Theme Options > Header tab. In there, you can choose the Header Layout, configure your breadcrumb and other options.
Header Layout
Umbala comes with 2 different header layouts. Just choose one of our header layouts for your site.
You can also choose the header layout for individual pages (See Page Options).
Breadcrumb
Just choose one of our breadcrumb layouts for your site.
You can also choose the breadcrumb layout for individual pages (See Page Options).
Other Options
- Header Contact Information: Add your contact information in the top header
- Header Currency: Show/Hide multi-currency switcher
- Header Language: Show/Hide multi-language switcher
- My Account: Show/Hide the login form/my account link
- My Account Type: Choose Type display my account
- Wishlist: Show/Hide the wishlist page link
- Shopping Cart: Show/Hide mini cart
- Shopping Cart Type: Choose Type Cart
- Search Bar: Show/Hide the search bar
- Ajax search Show/Hide the ajax search

Header Customization
If you want to customize the theme, you should create the child theme before making any changes.
Please note that you have to install the required plugins before activating the child theme. Otherwise, you will get an error if you install the plugins in Appearance > Install Plugins page.You can find the sample child theme package (Umbala-child.zip file) in your downloaded file (you have to download All files & documentation).
Follow the steps below to override header template:
- Copy the template file from the parent theme folder to the child theme folder
- Edit the template file in the child theme folder
Footer
Setting Footer

Setting Footer Home page

You can choose of custom footer
Setting Footer Page

You can view Page Option
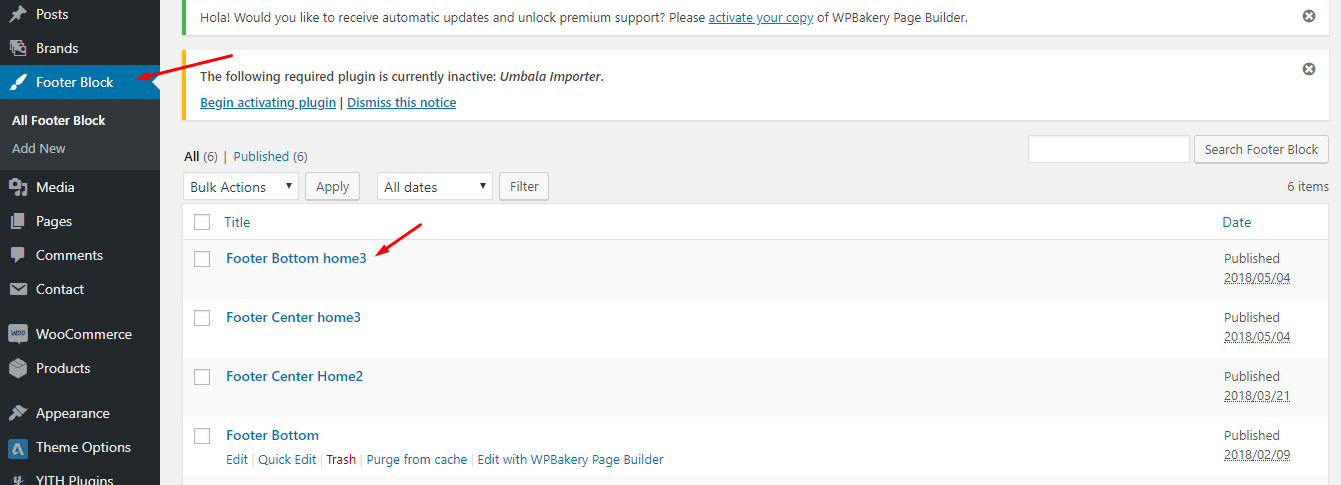
Custom Footer
You can custom footer with Footer Block
Blog
Umbala supports 5 post formats: Standard, Audio, Gallery, Quote and Video. They will help you easily make a microblogging website.
Create A New Post
Follow the steps below to create a new post:
- Go to Posts
- Click on the Add New button
- Input the post title and post content
- Choose the post format and category on the right hand side
- Scroll down and find the Post Options section, make some configurations for your post

WooCommerce
Alura is compatible with WooCommerce, and includes design integration as well as custom shortcodes. WooCommerce is an external plugin. Alura documentation includes only basic information for installation and activation. The following links will take you to additional information for using WooCommerce.
- Woocommerce Plugin Page - The official WooCommerce plugin page.
- Woocommerce Documentation - WooCommerce Online documentation created by WooThemes
- Woocommerce Forums - The community forum for WooCommerce plugin created by WooThemes
- Woocommerce Shortcodes - Shortcodes for WooCommerce
Following plugin activation, you'll be able to use the WooCommerce Onboarding Wizard to take you through the steps to set up your store.
Setting Up WooCommerce
To set up WooCommerce, you go to WooCommerce > Settings in admin panel.
Currency Options
- In WooCommerce Settings page, you select the General tab
- You find Currency Options section and configure your currency
List of currencies that you can choose

Page Settings
After you create WooCommerce pages. You will go to the Settings page to assign them.
- To assign the Shop page, you select the Products tab and then select the Display sub tab
- To assign the My Account page, you select the Accounts tab
- To assign the Cart and Checkout pages, you select the Checkout tab

Registration Options
You also make sure that you allow your customers to register on your site. You select the Accounts tab and find the Registration Options section as the screenshot.

Adding Product
Product Images
WooCommerce 3.3.x then use WordPress Customizer (it’s a feature in the WordPress admin) to change the catalog and single product Image settings.
Go to Appearance > Customize > WooCommerce > Product Images.
You can read more Image Size Woocommerce
Widget Setting

There are 17 default widget areas you can activate to add your own content and functionality (Appearance > Widgets):
Home sidebar - Default sidebar for all pages and posts.
Blog sidebar - Default use for Blog Page.
Blog Detail sidebar - Default use Blog Detail Page.
Product Category sidebar - Default use Shop Page,Category Page.
Product Detail sidebar - Default use Product Detail page.
Product Filters Area Content sidebar - Default use Filter content.
Of Course: You can change widget easily
Widget Setting
Plugins
We do not guarantee compatibility with WordPress third-party plugins. You may need to customize some extensions to make them work properly with AluraStudio.
Include Plugins
The XStore package features the following plugins:
Required plugins
- AluraStudio: A plugin that includes additional functionality of the AluraStudio theme (Portfolio, Testimonials, Static Blocks etc.).
- CMB2: Custom Metaboxes.
- Redux Framework: Theme Options.
- Revolution: Create Slider.
- WPBakery Visual Comporser(Js Comporse): Page Builder.
- Woocommere: A plugin for selling online.
- MailChimp For WordPress: A plugin adds various highly effective sign-up methods to your site.
Recommended plugins
Since we did not design and develop these plugins, check the respective developers’ websites for setup information and documentation.
Plugin Update
Plugin’s authors regularly release updates. To use all the features, or fix existing issues, keep up-to-date on the plugins’ versions, so you can update them on your installations
To update the plugins, switch to your server with FTP. Copy extracted plugins folders into wp-content/plugins/ folder on your server.
And You can on Channel support https://alura-studio.com for supported or send mail address:[email protected]
Update
All update and Changlog Details of the update.
Version 1.5
- Add new Home 4(Lonia) Link
- Add new Home 5(Frozen) Link
- Add page option Absolute Header
 Link example
- Add new 2 header
+ Layout 5 width container

+ Layout 6 full width container

- Blog update link
- Product Update link
Version 1.6
- Add header Mobile Layout


- Add option Scroll link

- Add Detail Layout Full page Full image

- Add new shortcode :
+ LookBook Link
+ Image 360 View Link
+ Lightbox